
はじめに
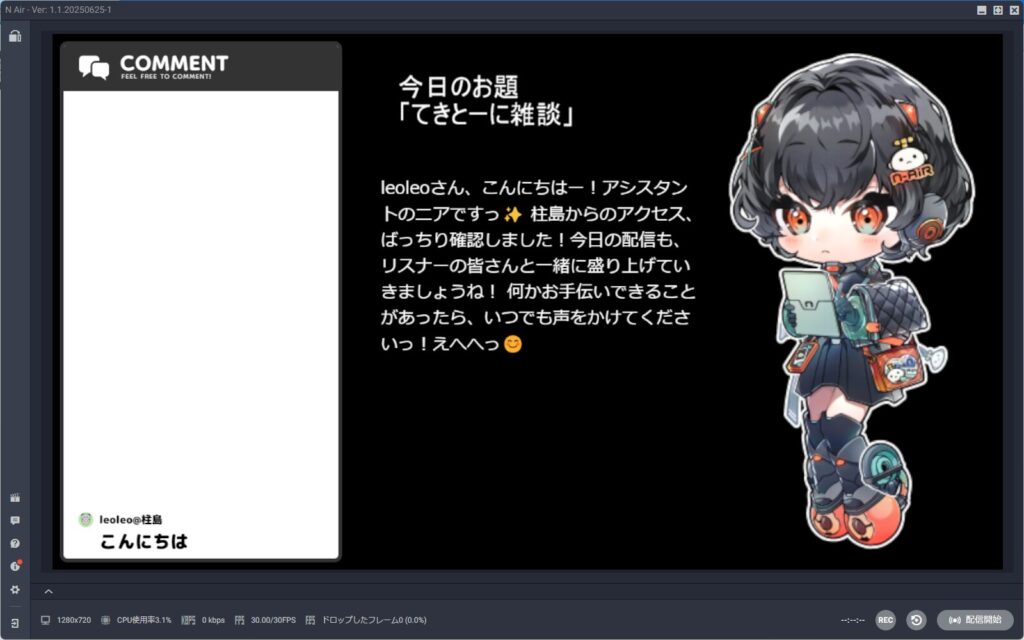
YouTubeやニコ生といったライブ配信のコメントで、AI(Google Gemini)と会話(チャット)できる、わんコメ用のプラグインを作りました。AIの応答はVOICEVOXで喋らせることができ、またHTMLファイルに書き出すことで配信画面に表示させることができます。
わんコメプラグインに関するページ

プラグインの導入 | わんコメ - OneComme | 配信者のためのコメントアプリ
わんコメにプラグインを追加する方法
onecomme.com
プラグイン | わんコメ - OneComme | 配信者のためのコメントアプリ
わんコメ搭載のプラグイン機能について
onecomme.com
前準備
Google Gemini APIキーの取得
Googleの生成AIを使うには、APIキーの取得が必要です。
手順
- Google AI Studio(MakerSuite) にアクセス
- Googleアカウントでログイン
- 画面右上のメニューから「APIキー」→「新しいAPIキーを生成」
- 表示されたAPIキーをコピーして
.envに保存
GOOGLE_API_KEY=あなたのAPIキーNode.js のインストール
Node.js — Run JavaScript Everywhere
Node.js® is a free, open-source, cross-platform JavaScript runtime environment that lets developers create servers, web ...
nodejs.org
推奨版(LTS)をダウンロードしてインストールする。
VOICEVOXエンジンのインストール

VOICEVOX | 無料のテキスト読み上げ・歌声合成ソフトウェア
無料で使える中品質なテキスト読み上げ・歌声合成ソフトウェア。商用・非商用問わず無料で、誰でも簡単にお使いいただけます。イントネーションを詳細に調整することも可能です。
voicevox.hiroshiba.jp
環境フォルダ・ファイル構成の準備
このプロジェクトでは、以下のパスにファイルを配置します。
%APPDATA%/onecomme/plugins/gemini-ai-chat/必須ファイル一覧
| ファイル名 | 説明 |
|---|---|
plugin.js | メインのNode.jsプラグイン |
gemini.js | Geminiとのチャット通信ラッパー |
play-voice.js | 音声再生スクリプト |
plugin_init.html | 初期状態のHTMLテンプレート |
plugin.html | コメントごとに書き換えられるHTML |
.env | APIキーなどの環境設定 |
必要なNode.jsパッケージのインストール
npm install speaker wav pcm-volume cheerio dotenv @google/generative-aiプログラムの説明
前提
以下のプログラムはChatGPTの力を借りて作ったものです。
自分はずっとCとかC++とかやってた人間なので、正直JavaScriptは理解できてないところがあります。
なので、説明に誤りがあったらごめんなさい。
gemini.js
概要
Googleの生成AI「Gemini」をNode.jsから利用するためのスクリプトです。
ソースコード
const path = require('path');
const dotenv = require('dotenv');
const { GoogleGenerativeAI } = require("@google/generative-ai");

// 環境変数の読み込み
const envPath = path.join(process.env.APPDATA, 'onecomme', 'plugins', 'gemini-ai-chat', '.env');
dotenv.config({ path: envPath });

// モデル準備
const genAI = new GoogleGenerativeAI(process.env.GOOGLE_API_KEY);
const model = genAI.getGenerativeModel({ model: process.env.GEMINI_MODEL || "gemini-2.5-pro" });

// チャット履歴管理
let chat = null;

async function initChat(historyMessages = []) {
    const history = historyMessages.map((text) => ({
        role: "user",
        parts: [{ text }]
    }));

    chat = model.startChat({ history });
}

async function askGemini(prompt) {
    if (!chat) {
        await initChat(); // 履歴なしで初期化
    }

    const result = await chat.sendMessage(prompt);
    return result.response.text();
}

function resetChat() {
    chat = null;
}

module.exports = { initChat, askGemini, resetChat };
コードの説明
外部モジュールの読み込み
const path = require('path');
const dotenv = require('dotenv');
const { GoogleGenerativeAI } = require("@google/generative-ai");pathモジュールでファイルパスを安全に扱います。dotenvは.envファイルから環境変数を読み込みます。@google/generative-aiはGemini APIの公式クライアントライブラリです。
環境変数の読み込み
const envPath = path.join(process.env.APPDATA, 'onecomme', 'plugins', 'gemini-ai-chat', '.env');
dotenv.config({ path: envPath });.envファイルのパスをAPPDATA以下に指定しており、ローカルアプリとしての想定です。- このファイルには
GOOGLE_API_KEYと(任意で)GEMINI_MODELが含まれているはずです。
補足:.env ファイルのサンプル
# Google Generative AI の API キー
GOOGLE_API_KEY=AIzaSyExampleYourRealKeyHere

# 使用するモデル(任意)
# gemini-1.5-pro や gemini-2.5-pro など指定可能
# 未指定なら gemini-2.5-pro が使われます
GEMINI_MODEL=gemini-2.5-proGOOGLE_API_KEYは、Google AI Studio などで取得できる 有効なAPIキー を入力してください。GEMINI_MODELは必須ではありません。省略した場合は"gemini-2.5-pro"が使われますが、試験的なモデル(例:gemini-1.5-flash)も利用可能です。
Gemini モデルの初期化
const genAI = new GoogleGenerativeAI(process.env.GOOGLE_API_KEY);
const model = genAI.getGenerativeModel({ model: process.env.GEMINI_MODEL || "gemini-2.5-pro" });GOOGLE_API_KEYを使ってクライアントを初期化します。- モデルは環境変数で指定できますが、なければ
"gemini-2.5-pro"をデフォルトで使用します。
チャット履歴の管理と初期化
let chat = null;

async function initChat(historyMessages = []) {
    const history = historyMessages.map((text) => ({
        role: "user",
        parts: [{ text }]
    }));

    chat = model.startChat({ history });
}- チャット履歴は、
historyMessagesで渡された文字列配列をもとに構築します。 - 履歴を設定してから
startChat()を呼び出すことで、文脈を持った対話が可能になります。
メッセージ送信とレスポンスの取得
async function askGemini(prompt) {
    if (!chat) {
        await initChat(); // 履歴なしで初期化
    }

    const result = await chat.sendMessage(prompt);
    return result.response.text();
}askGemini()はプロンプトを送り、Geminiの応答テキストを返します。-
chatが初期化されていない場合は、initChat()を呼んで初期化します。
チャットセッションのリセット
function resetChat() {
    chat = null;
}- セッションをリセットすることで、新しい文脈でのチャットを開始できます。
モジュールエクスポート
module.exports = { initChat, askGemini, resetChat };- このモジュールを他のスクリプトから利用することで、簡単にGeminiとのチャット機能を組み込むことができます。
play-voice.js
概要
VOICEVOXエンジンを使って音声合成し、その音声をNode.jsで再生するスクリプトです。
コマンドライン引数からテキストと音量を受け取り、リアルタイムで読み上げます。
ソースコード
const { Readable } = require('stream');
const Speaker = require('speaker');
const wav = require('wav');
const Volume = require('pcm-volume');

const text = process.argv[2];
const volumeLevel = parseFloat(process.argv[3] || "1.0");
const speakerId = 74;

(async () => {
    try {
        const res = await fetch(`http://localhost:50021/audio_query?text=${encodeURIComponent(text)}&speaker=${speakerId}`, {
            method: "POST",
            headers: { 'Content-Type': 'application/json' }
        });

        if (!res.ok) throw new Error("audio_query failed");

        const query = await res.json();

        const soundRes = await fetch(`http://localhost:50021/synthesis?speaker=${speakerId}&enable_interrogative_upspeak=true`, {
            method: "POST",
            headers: {
                'Content-Type': 'application/json',
                'accept': 'audio/wav'
            },
            body: JSON.stringify(query)
        });

        if (!soundRes.ok) throw new Error("synthesis failed");

        const arrayBuffer = await soundRes.arrayBuffer();
        const buffer = Buffer.from(arrayBuffer);

        const reader = new wav.Reader();
        reader.on('format', function (format) {
            const volume = new Volume();
            const clampedVolume = Math.max(0, Math.min(2.0, volumeLevel));
            volume.setVolume(clampedVolume);

            const speaker = new Speaker(format);
            speaker.on('close', () => process.exit(0));

            reader.pipe(volume).pipe(speaker);
        });

        const stream = Readable.from(buffer);
        stream.pipe(reader);

    } catch (err) {
        console.error("音声再生エラー:", err.message || err);
        process.exit(1);
    }
})();
コードの説明
外部モジュールの読み込み
const { Readable } = require('stream');
const Speaker = require('speaker');
const wav = require('wav');
const Volume = require('pcm-volume');- 音声バッファのストリーミング再生のためのモジュール群を読み込みます。
パラメータの設定
const text = process.argv[2];
const volumeLevel = parseFloat(process.argv[3] || "1.0");
const speakerId = 74; // 任意の話者ID(VOICEVOXに依存)- 引数からテキストと音量を取得します。
speakerIdは話者のIDです。
補足:話者IDの確認方法
VOICEVOXのエンジンが起動していれば、以下のURLにアクセスすることで話者一覧が取得できます。
http://localhost:50021/speakersVOICEVOX API に問い合わせる
const res = await fetch(`http://localhost:50021/audio_query?text=${encodeURIComponent(text)}&speaker=${speakerId}`, {
    method: "POST",
    headers: { 'Content-Type': 'application/json' }
});

if (!res.ok) throw new Error("audio_query failed");

const query = await res.json();- 音声合成の前段階として、話し方の調整情報を含む
audio_queryを生成します。 - 失敗した場合は、エラーを投げます。
const soundRes = await fetch(`http://localhost:50021/synthesis?speaker=${speakerId}&enable_interrogative_upspeak=true`, {
    method: "POST",
    headers: {
        'Content-Type': 'application/json',
        'accept': 'audio/wav'
    },
    body: JSON.stringify(query)
});

if (!soundRes.ok) throw new Error("synthesis failed");

const arrayBuffer = await soundRes.arrayBuffer();
const buffer = Buffer.from(arrayBuffer);audio_queryを使って、実際の音声ファイル(WAV)を取得します。- 失敗した場合は、エラーを投げます。
音声の再生処理
const reader = new wav.Reader();
reader.on('format', function (format) {
    const volume = new Volume();
    const clampedVolume = Math.max(0, Math.min(2.0, volumeLevel));
    volume.setVolume(clampedVolume);

    const speaker = new Speaker(format);
    speaker.on('close', () => process.exit(0));

    reader.pipe(volume).pipe(speaker);
});wav.Readerがフォーマットを検出したら、音量を調整しながらSpeakerに流し込みます。- 音量は0.0~2.0の範囲に調整します。
- 再生終了後にプロセスを終了します。
const stream = Readable.from(buffer);
stream.pipe(reader);- バッファをストリーム化して
wav.Readerに渡します。
エラーハンドリング
} catch (err) {
    console.error("音声再生エラー:", err.message || err);
    process.exit(1);
}plugin.js
概要
YouTube Liveやニコ生のコメントをAIがリアルタイムで反応して読み上げてくれる配信アシスタントを作成するNode.jsスクリプトです。
ソースコード
const { askGemini, initChat } = require('./gemini');
const { spawn, exec } = require('child_process');

const VOICE_VOLUME = 0.5;
const SILENCE_TIMEOUT_MS = 60000; // 60秒

let silenceTimer = null;
let pluginStartTime = 0;

module.exports = {
  name: 'Gemini AI Chat',
  uid: 'com.yourname.gemini-aichat',
  version: '1.0.0',
  author: 'leoleo',
  permissions: ['comments'],

    init({ dir, store }, initialData) {
        pluginStartTime = Date.now();

        const child = spawn('"C:\\Program Files\\VOICEVOX\\VOICEVOX.exe"', {
            shell: true,
            detached: true,
            stdio: 'ignore', // 出力を完全に無視
        });
        child.unref(); // Node.js プロセスが VOICEVOX を待たずに終了できる

        initChat([
            "あなたはleoleoの配信のアシスタントです(CV:琴詠ニア)。",
            "応答は長くても180文字程度にしてください。"
        ]);
        initHtml();
    },

    destroy() {
        exec('taskkill /IM VOICEVOX.exe /F', (err) => {
            if (err) console.error('VOICEVOX終了失敗:', err);
        });
    },

  subscribe(type, ...args) {
    if (type !== 'comments') return;

    for (const item of args) {
        for (const commentData of item.comments) {
            if (!isRecentComment(commentData)) continue; // 無視

            const rawComment = commentData?.data?.comment?.trim();
            const name = commentData?.data?.name?.trim() || '匿名';
            if (!rawComment) continue;

            const fullComment = `${name}: ${rawComment}`;

            // タイマーリセット
            resetSilenceTimer();

            askGemini(fullComment)
                .then(reply => {
                    createVoice(reply, VOICE_VOLUME);
                })
                .catch(err => {
                    console.error('Gemini API error:', err);
                });
        }
    }
  }
};

function isRecentComment(commentData) {
    const timestampStr = commentData?.data?.timestamp;
    if (!timestampStr) return true; // timestamp がなければ通す

    const commentTime = new Date(timestampStr).getTime();

    // 起動時刻より前のコメントはスキップ(無視)
    return commentTime >= pluginStartTime;
}

function resetSilenceTimer() {
    if (silenceTimer) {
        clearTimeout(silenceTimer);
    }

    silenceTimer = setTimeout(() => {
        // すでに発話中ならスキップ(次の reset はコメント受信時に)
        if (isSpeaking) {
            // タイマーを再設定せずに終了(ループ防止)
            return;
        }

        askGemini("独り言おねがい").then(reply => {
            createVoice(reply, VOICE_VOLUME);
        }).catch(err => {
            console.error('Gemini API error (silence):', err);
        }).finally(() => {
            // ← ここで再タイマーを仕掛けるとループする
            resetSilenceTimer();
        });
    }, SILENCE_TIMEOUT_MS);
}

const fs = require('fs');
const cheerio = require('cheerio');
const path = require('path');

const htmlPath = path.join(process.env.APPDATA, 'onecomme', 'plugins', 'gemini-ai-chat', 'plugin.html');
const initPath = path.join(process.env.APPDATA, 'onecomme', 'plugins', 'gemini-ai-chat', 'plugin_init.html');

function initHtml(){
    fs.copyFileSync(initPath, htmlPath);
}

function createHtml(text) {
  fs.readFile(htmlPath, 'utf8', (err, data) => {
    if (err) throw err;

    const $ = cheerio.load(data);

    $('div').text(text);

    // 書き換えたHTMLを文字列化
    const newHtml = $.html();

    fs.writeFile(htmlPath, newHtml, 'utf8', (err) => {
      if (err) throw err;
    });
  });
}

const voiceQueue = [];
let isSpeaking = false;

function createVoice(text, volumeLevel = 1.0) {
    return new Promise((resolve, reject) => {
        voiceQueue.push({ text, volumeLevel, resolve, reject });
        processQueue();
    });
}

function processQueue() {
    if (isSpeaking || voiceQueue.length === 0) return;

    const { text, volumeLevel, resolve, reject } = voiceQueue.shift();
    isSpeaking = true;

    const clampedVolume = Math.max(0.0, Math.min(1.0, volumeLevel));
    const voicePath = path.join(process.env.APPDATA, 'onecomme', 'plugins', 'gemini-ai-chat', 'play-voice.js');

    const child = spawn(
        'node',
        [voicePath, text, clampedVolume.toString()],
        {
            stdio: 'ignore',  // デバッグ時は 'inherit' にするとログ出る
            detached: false,  // 終了イベントを受けるため false
            shell: false,
        }
    );

    createHtml(text);

    child.on('close', (code) => {
        isSpeaking = false;
        resolve();        // 呼び出し元に「終わったよ」と伝える
        processQueue();   // 次の音声へ

        // 喋り終わったので沈黙タイマー再スタート
        resetSilenceTimer();
    });

    child.on('error', (err) => {
        isSpeaking = false;
        reject(err);
        processQueue();   // エラーでもキュー継続
    });
}
コードの説明
外部モジュールの読み込み
const { askGemini, initChat } = require('./gemini');
const { spawn, exec } = require('child_process');
パラメータの設定
const VOICE_VOLUME = 0.5;
const SILENCE_TIMEOUT_MS = 60000; // 60秒

let silenceTimer = null;
let pluginStartTime = 0;VOICE_VOLUMEは読み上げの音量です。SILENCE_TIMEOUT_MSは無言タイマーのタイムアウト時間です。
初期化処理
init({ dir, store }, initialData) {
    pluginStartTime = Date.now();

    const child = spawn('"C:\\Program Files\\VOICEVOX\\VOICEVOX.exe"', {
        shell: true,
        detached: true,
        stdio: 'ignore',
    });
    child.unref();

    initChat([
        "あなたはleoleoの配信のアシスタントです(CV:琴詠ニア)。",
        "応答は長くても180文字程度にしてください。"
    ]);
    initHtml();
}- VOICEVOXエンジンを起動します(Windows前提)。
- Geminiとのチャット履歴を初期化します。
- HTMLファイルの初期化も実施します。
プラグイン終了時の処理
destroy() {
    exec('taskkill /IM VOICEVOX.exe /F', (err) => {
        if (err) console.error('VOICEVOX終了失敗:', err);
    });
}- VOICEVOXプロセスを終了します。
コメント受信時の処理
subscribe(type, ...args) {
    if (type !== 'comments') return;

    for (const item of args) {
        for (const commentData of item.comments) {
            if (!isRecentComment(commentData)) continue; // 無視

            const rawComment = commentData?.data?.comment?.trim();
            const name = commentData?.data?.name?.trim() || '匿名';
            if (!rawComment) continue;

            const fullComment = `${name}: ${rawComment}`;

            // タイマーリセット
            resetSilenceTimer();

            askGemini(fullComment)
                .then(reply => {
                    createVoice(reply, VOICE_VOLUME);
                })
                .catch(err => {
                    console.error('Gemini API error:', err);
                });
        }
    }
}- 名前付きでコメントをGeminiに送信し、応答をVOICEVOXで音声化します。
- プラグイン起動前の古いコメントは無視します。
コメントの判定
function isRecentComment(commentData) {
    const timestampStr = commentData?.data?.timestamp;
    if (!timestampStr) return true; // timestamp がなければ通す

    const commentTime = new Date(timestampStr).getTime();

    // 起動時刻より前のコメントはスキップ(無視)
    return commentTime >= pluginStartTime;
}- 起動時のタイムスタンプとコメントのタイムスタンプを比較して、コメントがプラグイン起動後に受信したかの判定をします。
無言タイマー
function resetSilenceTimer() {
    if (silenceTimer) {
        clearTimeout(silenceTimer);
    }

    silenceTimer = setTimeout(() => {
        // すでに発話中ならスキップ(次の reset はコメント受信時に)
        if (isSpeaking) {
            // タイマーを再設定せずに終了(ループ防止)
            return;
        }

        askGemini("独り言おねがい").then(reply => {
            createVoice(reply, VOICE_VOLUME);
        }).catch(err => {
            console.error('Gemini API error (silence):', err);
        }).finally(() => {
            // ← ここで再タイマーを仕掛けるとループする
            resetSilenceTimer();
        });
    }, SILENCE_TIMEOUT_MS);
}- 一定時間コメントが来ないときにAIに「独り言」を喋らせるためのタイマーです。
音声生成・再生
const voiceQueue = [];
let isSpeaking = false;

function createVoice(text, volumeLevel = 1.0) {
    return new Promise((resolve, reject) => {
        voiceQueue.push({ text, volumeLevel, resolve, reject });
        processQueue();
    });
}

function processQueue() {
    if (isSpeaking || voiceQueue.length === 0) return;

    const { text, volumeLevel, resolve, reject } = voiceQueue.shift();
    isSpeaking = true;

    const clampedVolume = Math.max(0.0, Math.min(1.0, volumeLevel));
    const voicePath = path.join(process.env.APPDATA, 'onecomme', 'plugins', 'gemini-ai-chat', 'play-voice.js');

    const child = spawn(
        'node',
        [voicePath, text, clampedVolume.toString()],
        {
            stdio: 'ignore',  // デバッグ時は 'inherit' にするとログ出る
            detached: false,  // 終了イベントを受けるため false
            shell: false,
        }
    );

    createHtml(text);

    child.on('close', (code) => {
        isSpeaking = false;
        resolve();        // 呼び出し元に「終わったよ」と伝える
        processQueue();   // 次の音声へ

        // 喋り終わったので沈黙タイマー再スタート
        resetSilenceTimer();
    });

    child.on('error', (err) => {
        isSpeaking = false;
        reject(err);
        processQueue();   // エラーでもキュー継続
    });
}- 音声読み上げはキュー制御で順番に処理します。
- 実際の再生は
play-voice.jsを別プロセスで起動して行います。 - HTMLファイルへの反映もここで行います。
HTMLファイルの初期化
const fs = require('fs');
const cheerio = require('cheerio');
const path = require('path');

const htmlPath = path.join(process.env.APPDATA, 'onecomme', 'plugins', 'gemini-ai-chat', 'plugin.html');
const initPath = path.join(process.env.APPDATA, 'onecomme', 'plugins', 'gemini-ai-chat', 'plugin_init.html');

function initHtml(){
    fs.copyFileSync(initPath, htmlPath);
}plugin_init.htmlでHTMLファイルを初期化します。
補足:plugin_init.html のサンプル
<html>
<head>
  <meta charset="UTF-8">
  <style>
    #watchme {
      font-size: 32px;
      color: white;
    }
  </style>
<script>
  setInterval(() => {
    location.reload(true);
  }, 1000); // 1秒ごとにリロード
</script>
</head>
<body>
<div id="watchme"></div>
</body>
</html><style>の中で文字の大きさや色を指定します。- 画面更新のために、1秒ごとにリロードさせています。
テキストをHTMLファイルに反映
function createHtml(text) {
  fs.readFile(htmlPath, 'utf8', (err, data) => {
    if (err) throw err;

    const $ = cheerio.load(data);

    $('div').text(text);

    // 書き換えたHTMLを文字列化
    const newHtml = $.html();

    fs.writeFile(htmlPath, newHtml, 'utf8', (err) => {
      if (err) throw err;
    });
  });
}- 合成音声の内容をHTMLに書き出し、OBSなどで可視化できるようにします。
最後に
APIキー以外のところはコピペでいけるはずです。
分からないことがあったら、コメントしていただければと思います。


コメント